Gallery:Homura: Difference between revisions
m (added rebellion images) |
(added images) |
||
| Line 79: | Line 79: | ||
File:Homura wrapped in ribbon.gif|Homura being wrapped in ribbon in [[Episode 3]] | File:Homura wrapped in ribbon.gif|Homura being wrapped in ribbon in [[Episode 3]] | ||
File:Madokamagica03_312.jpg|Homura after defeating | File:Tumblr meai6v1Z3Y1r717c6o8 r1 250.gif|[[Charlotte]] tries to eat Homura | ||
File:Tumblr meai6v1Z3Y1r717c6o6 r1 250.gif | |||
File:Tumblr meai6v1Z3Y1r717c6o9 r1 250.gif | |||
File:Homura charlotte big boom.gif | |||
File:Madokamagica03_312.jpg|Homura after defeating Charlotte | |||
File:462033-1.jpg|Homura from [[Episode 4]] | File:462033-1.jpg|Homura from [[Episode 4]] | ||
| Line 112: | Line 116: | ||
File:Homura Vs Walpurgis Night.gif | File:Homura Vs Walpurgis Night.gif | ||
File:Homura_Walpurgis.gif | File:Homura_Walpurgis.gif | ||
File:Walpurgis bout to be shot at.gif | |||
File:Homura tied up on the wheel of time.gif|Homura tied up on the wheel of time | File:Homura tied up on the wheel of time.gif|Homura tied up on the wheel of time | ||
File:EC11.jpg|Episode 11 end card by Buriki | File:EC11.jpg|Episode 11 end card by Buriki | ||
| Line 130: | Line 135: | ||
==The Rebellion Story== | ==The Rebellion Story== | ||
<gallery> | <gallery> | ||
File:Rebellion homura introduction.jpg|Homura's introduction from [[Rebellion]] | |||
File:Homuras introduction.gif | |||
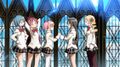
File:Rebellion girls meeting.jpg | |||
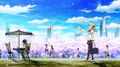
File:Rebellion flower field.jpg | |||
File:Rebellion homura transform end.gif|The end of Homura's transformation | |||
File:Bebe scares homura.gif | |||
File:Girls fly!.gif | |||
File:Double_date.gif | File:Double_date.gif | ||
File:Lets go for cake!.gif | |||
File:Rebellion cafe.jpg | |||
File:Rebellion bus stop.jpg | |||
File:Rebellion running to kazamino.jpg|Homura and Kyoko running to Kazamino city | |||
File:BroTP_1.gif | File:BroTP_1.gif | ||
File:BroTP_2.gif | File:BroTP_2.gif | ||
File:Rebellion godoka mural.jpg | |||
File:Rebellion mamis house.jpg | |||
File:Mami_vs_homu_fight.gif|Homura versus Mami | File:Mami_vs_homu_fight.gif|Homura versus Mami | ||
File:Homura vs mami.gif | |||
File:Sayaka_vs_homura.jpg|Sayaka stops Homura's time pausing | File:Sayaka_vs_homura.jpg|Sayaka stops Homura's time pausing | ||
File:Field_21.gif | File:Field_21.gif | ||
File:Homura_hair_move.gif | File:Homura_hair_move.gif | ||
File:Homura on bus.gif | |||
File:Black dress homura.gif | |||
File:Ep1148345.jpg|Homura deep in despair | File:Ep1148345.jpg|Homura deep in despair | ||
File:Would you shut up already?!.gif | |||
File:Homuras realisation.gif | |||
File:Rebellion madokas pink explosion.jpg | |||
File:BroTP_3.gif | File:BroTP_3.gif | ||
File: | File:Rebellion madoka homura bows.jpg|Madoka and Homura with their bows | ||
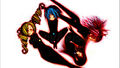
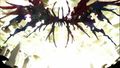
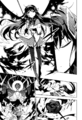
File:Devil homura transformation.gif|Devil Homura | |||
File:DEVIL_HEAD_TILT.jpg | |||
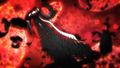
File:Chernabog_spreads_her_wings.jpg | File:Chernabog_spreads_her_wings.jpg | ||
File:Satan_Homura.jpg | File:Satan_Homura.jpg | ||
File:Rebellion mami new world.jpg|Homura in the new world | |||
File:Hand_animation_1s.gif | File:Hand_animation_1s.gif | ||
File:Devil homura bleeds kinda.gif | |||
File:Rebellion homura alone.jpg|Homura ends up all alone | |||
File:Homuras dark orb.gif | |||
</gallery> | </gallery> | ||
Revision as of 12:28, 13 November 2020
Official art
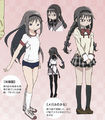
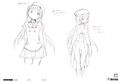
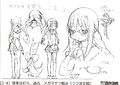
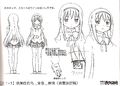
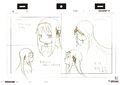
Concept Art
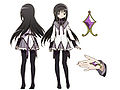
Initial design
Original character design by Ume Aoki
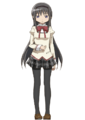
Homura in her school uniform
from the Blu-Ray Volume 2 Booklet

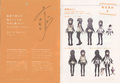
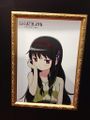
Early production sketch of Homura. Note that her surname is shown here as (暁海) instead of (暁美). Both are read as Akemi
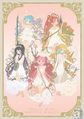
Art of Homura with Madoka's ribbons
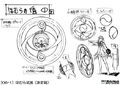
Homura's shield
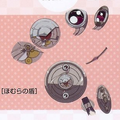
Homura's shield coloured
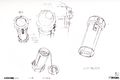
Homura's pipe bombs
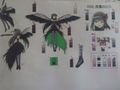
Devil Homura concept art

Homura's dark orb


Posters

Promotional poster from the Dog Association
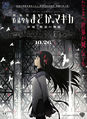
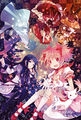
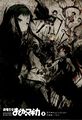
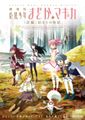
The first Rebellion poster

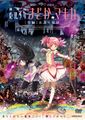
The second Rebellion poster
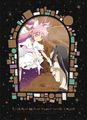
The third Rebellion poster


Magazines

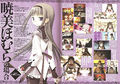
The cover of Megami magazine featuring Homura with Amy

Same magazine with a clearer page

NyanType May 2011

Megami magazine, July 2011
Newtype magazine, July 2011

Megami magazine, March 2012


Art by other artists
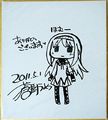
Autographed illustration by Ume Aoki

Replica sign boards
Art by Junichiro Taniguchi
Rebellion Week 5 Thank You Card - Back


Promotional Art
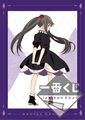
Ichiban Kuji Puella Magi Magiccraft visual board
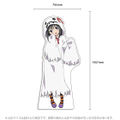
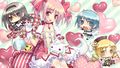
Aniplex+ Limited Edition Halloween Costume panel


Other Art

Official art of Homura and Madoka
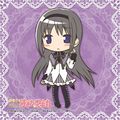
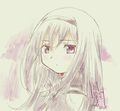
Art of a chibi Homura


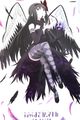
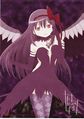
Art of Devil Homura


Screenshots
Homura first appearance in Episode 1 from Madoka's dream
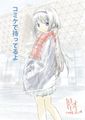
Homura holding an umbrella from the opening from the Beginnings movie

Homura's introduction to the class
Homura shows her intelligence in class

Episode 2 end card by Hekiru Hikawa

Homura being wrapped in ribbon in Episode 3

Charlotte tries to eat Homura


Homura after defeating Charlotte

Homura from Episode 4
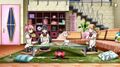
Madoka tries to tell Homura to look after Sayaka but she refuses, from Episode 5

Homura interrupts Kyoko and Sayaka's fight
Episode 5 end card by Yupon
Episode 6 end card by Hajime Ueda

Homura's transformation sequence from Episode 8

Episode 8 end card by Takuya Fujima

Homura with glasses in Episode 10

Homura coming back after her first time rewind

Homura's transformation sequence
Homura trying out her new time manipulation magic
Homura gets easily tired
Homura is wrapped in ribbon by Mami so she can't manipulate time
Homura changes her outlook

Homura heals her eyes with her magic
Homura travelling back in time

Episode 10 end card by Kuroe Mura
Homura hugs Madoka in Episode 11


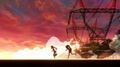
Homura's transformation sequence before fighting Walpurgisnacht


Homura tied up on the wheel of time

Episode 11 end card by Buriki
Homura crying in Episode 12

Homura wearing Madoka's ribbon in Madoka's new universe
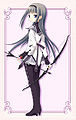
Homura using bow and arrow similar to Madoka's against Wraiths

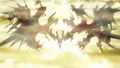
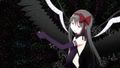
Homura with witch-like wings

Episode 12 end card by Ume Aoki
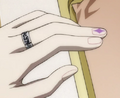
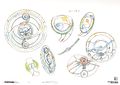
Homura's ring and fingernail
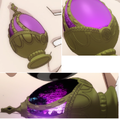
Homura's Soul Gem


The Rebellion Story

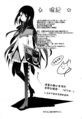
Homura's introduction from Rebellion
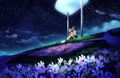
The end of Homura's transformation


Homura and Kyoko running to Kazamino city


Homura versus Mami

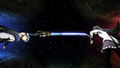
Sayaka stops Homura's time pausing


Homura deep in despair
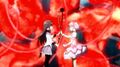
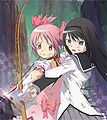
Madoka and Homura with their bows

Devil Homura

Homura in the new world


Homura ends up all alone


Manga

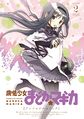
Manga cover, volume 1

Manga cover, volume 3
Bonus illustration from the manga
An illustration of Homura with her shield from the manga

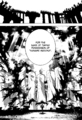
Homura as a transfer student in the Wraith Arc
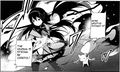

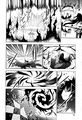
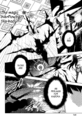
Homura unleashing her attack
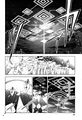
Note how Homura's attack summons a magic symbol similar to Madoka's
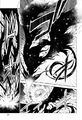
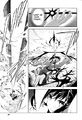
Homura has the ability to transform her magic arrow into a birdlike form
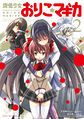
Oriko Magica cover, volume 3
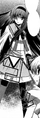
Homura as she appears in Oriko Magica

The Different Story cover, volume 3
Wraith Arc cover, volume 1
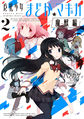
Wraith Arc cover, volume 2

Wraith Arc cover, volume 3

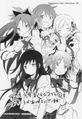
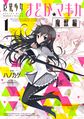
Rebellion manga cover, volume 1
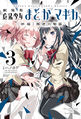
Rebellion manga cover, volume 3
Madoka Magica Anthology 2
- Ume aoki dojinshi homura.jpg
Ume Aoki's Dojinshi "RKGKMDK"

Homura neko
Inside cover page
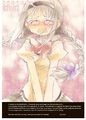
Crying Homura
- 16.jpg
Ending in widddeee-face Homura


Madoka Magica Portable

Homura's transformation in Madoka Magica Portable

Madoka Magica Online

Homura closeup from Madoka Magica Online

Merchandise

Blu-Ray Volume 1 cover (madoka, Homura)

Blu-Ray Volume 5 cover (homura, mami, madoka)

Blu-Ray Volume 6 cover (all 5)

Blu-Ray Volume box cover (all 5)
Beginnings DVD cover
Eternal DVD cover

Music collection CD cover

ClariS: Connect (Anime Edition) single cover
Kalafina: Magia ED (Anime Edition) single cover

Kalafine: Hikari Furu (Anime Edition) single cover

ClariS - Colorful (Anime Edition) single cover

Kalafina - Kimi no Gin no Niwa (Anime Edition) single cover


